|
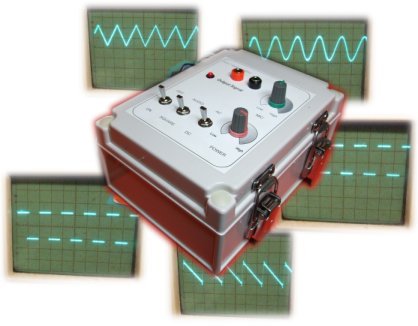
Instructions For The PFA-7 Amplifier
My PFA-7 Amplifier Just Arrived - Yeah! What Do I Do?
These instructions assume you have install the FreX software into your computer. Are able to navigate FreX's database, select a frequency program, send it to the program manager, and then run the program in the FreX Run Mode form. You have also validated that audio tones can be heard coming from speakers attached to your computer.
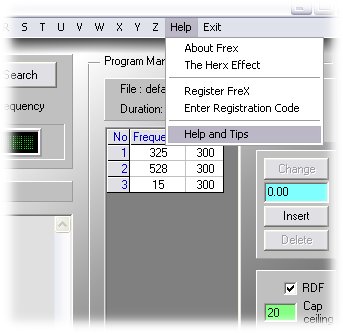
If you are not versatile in the above. Then learn how to do the above otherwise, running the PFA-7 may not offer value. There is a tutorial in the FreX Help and Tips Manual, which can be accessed from the FreX Help menu.
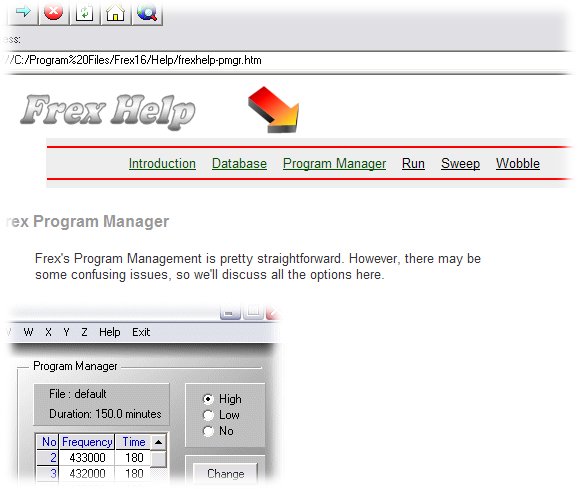
A brief and simply tutorial can be found in the Program Manager section of the FreX Help and Tips section.
When your PFA-7 arrives, carefully unpack it. You will have three separate items.
Open the PFA-7 case by pressing in the locking lugs on the side of the enclosure fastenings and pulling the fastening up.
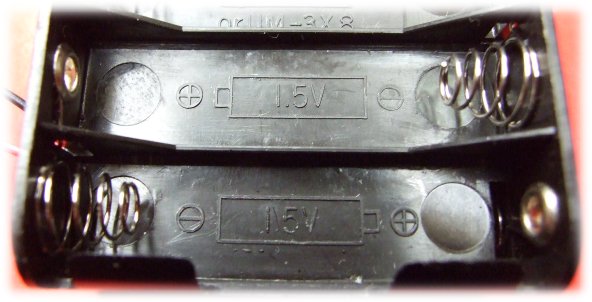
Mission critical to install the batteries to the correct polarity, otherwise the PFA-7 will not work. A battery diagram is imprinted into the battery holder cases.
After you have inserted the 12 batteries, check there are no loose battery wires at the 3 point terminal connection. Just an eye check is good enough here, we don't need to gentle tug on the wire, although you can do this if you feel a wire looks loose.
If a wire is loose, unscrew the terminal screw, re-insert the wire, and gently tighten it up. Retest the battery wire to make sure it is secure.
After the batteries are installed, secure the battery holders back to the PFA-7 base using the velcro tabs and sponge spacer.
If leads are connected, make sure lead clips or attached electrodes AREN'T TOUCHING. Now turn the OFF/ON switch to ON. The Red LED MUST come ON and be illuminated.
If the LED doesn't come on, recheck you have installed the batteries the correct way and that the wires from the battery holder are attached to the three point terminal connector on the PFA-7 circuit board. If you are not having success here e-mail me.
Instructions For Connecting the PFA-7 to Your Computer
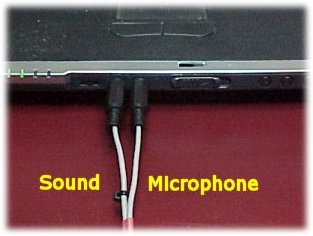
This connector is plugged into the speaker out or headphone out connector on your computer. Where we plug headphones or speakers to our computer. Make sure this connector is inserted all the way into the socket.
The other 3.5mm male connector is the "signal feed-back" microphone lead and is not required for operation. However, you may find it novel to be able to plug this into the microphone port, allowing you to monitor the signal as it goes through the body in the FreX oscilloscope and spectrum display.
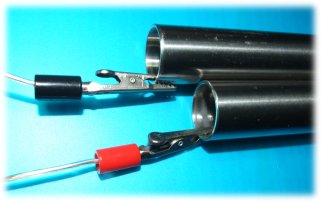
This type of connection has be used to cope with accidents. If someone is to trip over the leads or place too much pressure on the leads and tubes, then the connection will simply come apart, avoiding damage to other connectors and the amplifier.
Now Let's Set The PFA-7 Switches
When you switch the ON/OFF switch, you will see which way the switch goes to select the function. The switch is set to the label.
Great! We are now ready to go.
Make sure the metal tubes are not touching
Turn the PFA-7 amplifier ON
Use the tips of your finger and place one finger on the black tube and the other finger on the red electrode. You should not feel any sensation, if you do you are very sensitive and will require to reduce the power level to a setting where you just can faintly feel the power. Now hold the electrodes in both hands. The red electrode in the right hand and the black electrode in the left hand. Set a frequency around 500 Hz. Most people wont feel anything, or some may feel a slight tingle, while others it will be way too much power. Adjust the power dial lower until you are at the edge of where you can feel a sensation. Being a massage therapist, I have sensitive hands and feel the power well, but can tolerate full power on most frequencies.
We can also adjust the power level by the pressure we hold the stainless steel tubes. Firmly gripping the electrodes will put more power into the body and lightly holding them will reduce the power. We can also wrap tissues that have been soaked in saline solution around the two electrodes. This will increase power to the body several fold. Be careful if you do this as I don't want anyone to hurt themselves.
You are now ready to run a FreX program.
If you feel the power you will notice after a while of experimenting that it can change from frequency to frequency. The higher the frequency, the less the nerves in our hands and arms response or sense the power. At frequencies above 2,000 Hz, you will probably be able to have the power at full and not feel much at all. This is normal operation and the signal is still going very well to the body.
At full power the PFA-7 is outputting 18 volts peak-to-peak Positive Off-Set DC signal. At 14+ volts DC signals can burn the fat cells off the nerver endings in our fingers and leave a numbness feeling in our finger tips. These fat cells will slowly repair over a few years. So if you want to increase the battery power to increase the output, then you have been warned of possible damage you can do to your fingers.
One way to avoid this is to use metal plates or foot basins on the floor and attach the clips to them, placing bare feet on the plates will allow more power to be placed into the body without doing nerve damage. The PFA-4 amplifier is plenty powerful and you can daisy chain many electrodes together so numerous people can be treated at the same time. We will go through batteries a little quicker, but we should get 100 hours + use from them if used for multiple electrodes (more than 2).
Contra-Indicators
Do NOT use PFA-7 Amplifier under the follow situations
On anyone who wears a Pacemaker and or Defibrillator.
Changing Batteries
The AA batteries should provide many hundreds of hours operation. But should be changed when the Power On LED becomes dim and/or the signal degenerates in the FreX oscilloscope when under load. Rechargeable batteries are okay to use but will deliver less power.
Switch the PFA-7 OFF
The PFA-7 is pretty straight forward. Just unclip the enclosure fasteners then unzip the velcro tabs, careful remove the old batteries and install new ones. Always be mindful about the wire connections from the batteries to the three terminal connectors on the PFA-7 circuit board and the correct polarity of batteries to the battery diagrams.
IMPORTANT
When installing new batteries, it is important they are of the same type and same charge, otherwise the signal will be effected.
|
|
Ken Uzzell and his affiliates make no claims regarding PFA Series effects on your wellness. Ken Uzzell and his affiliates are not responsible for any loss or damage caused to you or your computer by the use of the PFA Series. The PFA Series is made available AS IS and carries a 12 month manufacturer's standard warranty. I hope you enjoy it in the spirit it has been developed, for the purpose of personal experimental research into wellness of audio frequency therapy.
The information provided on this site is for informational purposes only and is not intended as a substitute for advice from your physician or other health care professional or any information contained on or in any product label or packaging. You should not use the information on this site for diagnosis or treatment of any health problem or for prescription of any medication or other treatment. You should consult with a health care professional before starting any diet, exercise or supplementation program, before taking any medication, or if you have or suspect you might have a health problem. You should not stop taking any medication without first consulting your physician.
Last Update: 19th April 2012 |